

💬“In some ways, programming is like painting. You start with a blank canvas and certain basic raw materials. You use a combination of science, art, and craft to determine what to do with them.” (Andrew Hunt)
Why JavaScript?
💬“In some ways, programming is like painting. You start with a blank canvas and certain basic raw materials. You use a combination of science, art, and craft to determine what to do with them.” (Andrew Hunt)
Why JavaScript?
JavaScript, as you might know, is ubiquitous in today’s software development world. It is the foundation of frontend web development and is the key ingredient in frameworks like ReactJS, Angular, and VueJS. It can also help create solid backends with platforms like Nodejs, runs desktop applications like Slack, Atom, and Spotify, and runs on mobile phones as Progressive Web Apps (PWAs).
In short, it is everywhere—and for good reasons. For starters, compared to other languages like C and Java, JavaScript is generally easier to learn. When we say ‘easier’, we mean in terms of how quickly you can go from being a JavaScript novice to someone who can actually make a living writing professional, high quality JavaScript code. So, in that sense, it’s more accessible than some other languages like C and Java.
JavaScript is also a fun and rewarding language, which is especially important when you’re just getting started in software development. The community support is very good, so if you get stuck, there’s a good chance that the problem and its solution already exist on the web.
INTRODUCTION
Now that we’ve gotten a bird’s-eye view of JavaScript, let’s get into the more technical detail. JavaScript was created to add ‘life to webpages’. Just like HTML and CSS, JavaScript is written in plain text files with a .js extension.
As previously mentioned, JavaScript can be used to accomplish many useful operations on the frontend, like validating forms, alerting users, storing temporary data, and performing calculations—to name just a few.
😎Pro tip: Apart from the name itself, JavaScript has no relation to Java. Beginners often get confused between the two languages. Remember that Java is an entirely different language made for a different purpose (although you’ll still find it running on certain website backends).
Lastly, before we look at today’s itinerary, remember that JavaScript, just like HTML and CSS (but maybe even more so), is a vast language. We’ll only be learning parts of it that are relevant to us today, so we’ll list some good resources at the end if you’d like to learn more.
-------------------- ●●●--------------------
1. JavaScript basics
JavaScript is a programming language, and like most programming languages, it has some basic constructs that we’ll look at. A program in JavaScript is like a sequence of steps. Similar to how we give directions to a stranger, a computer needs detailed instructions, defined as steps, to accomplish any simple or complex action.
Let’s begin by looking at some basics.
Writing Javascript
We’ll create a new file for writing JavaScript called ‘script.js’ in the portfolio directory. Now open the index.html file, and just before the closing body tag (), insert this line.
<script src="script.js"></script>
That’s it. We have linked our script file in our HTML. Just to make sure it works, write the following code into your script.js file.
alert('hello world');
Save and refresh the page
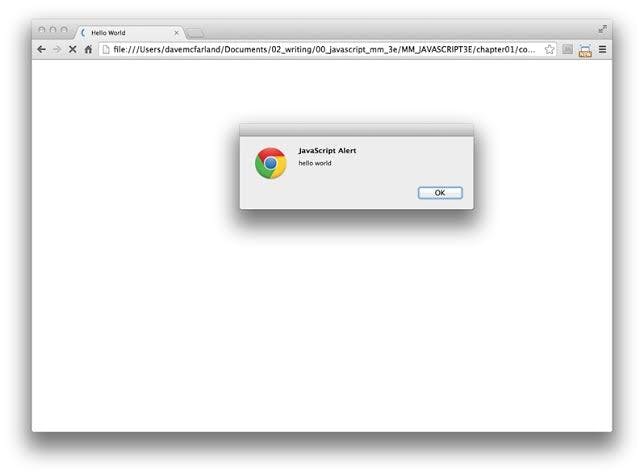
Notice the dialog box at the top? That’s your first line of JavaScript, the alert code, executing. Try changing the text and refreshing. You can do that in the CodePen below too!
If you followed along with the last section, you have correctly set up the script file. We’re ready to write some JavaScript! Let’s have a look at some important concepts.
Variables
Variables are friendly names that hold data. Think of how you call a person by their name as opposed to ‘human’ or ‘one head, two eyes, one nose…’ and so on. Variables are simply human-friendly (and descriptive) names for pieces of data. Let’s consider an example.
let greeting = 'Hello world';
Here we’re defining a variable called ‘greeting’ and assigning it the value of ‘Hello world’. It almost reads like English–’let greeting be Hello world’–see? Now greeting holds the value ‘Hello world’ in it, and can be used instead of the literal text ‘Hello world’.
alert('hello world');
you could write:
let greeting = 'Hello World';
alert(greeting);
Refresh the page and the result should be the same. While it seems like we’re doing more to achieve the same result, in the real world, variables are immensely useful for storing data. Variables can also be used to store different types of data such as numbers, strings, and other variables..
let age = 32;
let pi = 3.142;
let alphabet = 'a';
Did you notice how we wrote ‘let’ before the actual variable name? That’s one way of declaring a variable in JavaScript. You can learn more in this Mozilla guide to declarations.
Also note how each line ends with a semicolon (;). This isn’t strictly needed (except for some specific cases), but it’s best practice to use them, so we recommend you do so.
Arithmetic Operators
JavaScript can also be used as a calculator. In fact, a lot of the code you’ll see in the wild will have basic calculations everywhere. It supports all the regular functions, called operators, like plus (+), minus (-), multiply (*), divide (/) and so on. You could do something like the following and it should say 5, just as you’d expect. Try running the CodePen below and you should see a popup in the current browser window.
alert(2+3);
Comparison Operators
Comparison operators compare two things together. In English and other languages, we often ask questions like ‘Is it warmer today than yesterday’ or ‘Are these two buildings of the same size?’. The answer to these questions is either a yes or a no, and they’re usually comparing two things (today vs yesterday, building 1 vs building 2 etc). In programming terms, it is either a ‘true’ or ‘false’.
We can ask questions like those in JavaScript too! In JavaScript, we have the following comparison operators:
Operator      Question in asks

===    Are the two things equal?*
!==    Are the two things unequal?  *
>=    Is the first thing greater
than or equal to the second?
<=    Is the first thing less thanor equal to the second?
>    Is the first thing greater than the second?
<    Is the first thing less than the second?
*There are less strict variants of these, namely == and !=, which enable you to compare two things that may not be of the same type.
“1” == 1 is true, but “1” === 1 is not true, as “1” is a string, while 1 is a number.
We recommend you stick to strict equal/not equal (=== and !==), and avoid the use of == and !=
Functions
Functions are blocks of code to which we assign a name so that we can reuse them. Say adding two numbers is a common operation for our website. We can write the above code inside a function, as follows:
function add(number1, number2) {
let sum = number1 + number2;
return sum;
}
See how the function accepts two numbers (number1 and number2, formally called the parameters of the function), adds them, and ‘returns’ the result; in other words, sends the result back to you. Here we’ve defined how the ‘add’ function should behave, but we’re not using it. To use this code, we’ll need to ‘call’ it. Calling a function is simply writing its name and using parentheses to pass in the ‘arguments’ (actual parameters).
add(2, 3)
Let’s take another example. Consider a function that ‘alerts’ whatever is sent to it.
function alertMessage(message) {
alert(message);
}
In this function, alertMessage is the function name, message is the parameter and we have no return value (notice the missing return statement).
When we call it as alertMessage(‘Hello World’), the ‘Hello World’ part is the argument of the function. This is just the tip of the iceberg in the world of functions, but enough to get us moving.
Getting back to the add function, we’ll use it as follows:
function add(number1, number2) {
let sum = number1 + number2;
return sum;
}

let num1 = 2;
let num2 = 3;
let sum = add(num1, num2);
alert(sum);
Did it run okay? If not, look into the console and see if you have any syntactical errors.
Repeating what we said about variables, this might again seem like more work to do exactly the same thing, and you’d be right in saying that. However, this will help us prepare for something more than just adding two numbers together.
Flow control
Generally, a program in JavaScript will execute line by line. But there are instances when we wish to execute a statement based on some condition, or execute a group of statements multiple times. Such change in the order of execution of code is called flow control.
An example will make it clearer. Suppose you wish to show different messages to your users depending on whether they’re 18 and above or not. In plain English, your logic would be as follows:
If age is less than 18, display “You’re not an adult”, else, display “You’re an adult”
In JavaScript, you’d write the code as follows:
if(age < 18) {
 alert("You’re not an adult");
} else {
  alert("You’re an adult");
}
Notice how similar the plain English version is to the JavaScript code. What we just wrote is an example of an if..else statement. Notice the age < 18 part. That’s the condition. We’ve used the less than operator here from the Comparison Operators section above.
The general syntax of if..else is:
if(condition) {
  // code to run if condition is true
} else {
  // code to run if condition is false
}
We’ll use if..else whenever we’ll need to make a decision in the code–for example, making sure our users have entered the right data.
Objects
The last important concept needed for our website is the JavaScript object. Objects are simply containers for key-value pairs, similar to what you’d find in a dictionary. In a dictionary, a key is a word and a value is the meaning of the word. In a JavaScript object, a key is a name, and a value can be anything, even other objects. Let’s look at an example:
let fullName = {
  firstName: 'John',
  lastName: 'Doe'
}
In our example object, which is called ‘fullName’, firstName and lastName are keys, and ‘John’ and ‘Doe’ are the values.
We can access the firstName by using the dot (.) notation. The following will show the alert ‘John’.
let fullName = {
  firstName: 'John',
  lastName: 'Doe'
}

alert(fullName.firstName);
As mentioned, objects can have other objects and functions inside of them.
We can send an alert, in this case with:
let personDetails = {
  fullName: {
    firstName: 'John',
    lastName: 'Doe'
  },
  alertMessage: function(message) {
    alert(message);
  }
}


personDetails.alertMessage('Hello World');
2. Selecting HTML elements
The power of JavaScript on the web lies in its power to select and modify the HTML code. For example, we can write a function in JavaScript that gets called when we click the ‘submit’ button in our footer form.
To do that, let’s first select our submit button and attach a ‘click listener’ function to it. When we attach a click listener to an element, it will call that listener function when the button is clicked. To be able to select our button, we’ll give it an ID attribute with a unique ID in our HTML file.
<input type="submit" value="Send Message" id="submit-button" />
Now that we have an ID to select, let’s move to our JavaScript file and use a JavaScript function, document.querySelector() to select our element. Just like we could select HTML elements by their names, class attributes or IDs in CSS, we can the same in JavaScript using this function.
document.querySelector takes the selector as its parameter, and returns the HTML element that matched the selector, in the form of an Object (remember that Object are just containers for key-value pairs of data). We can then store this HTML element in a variable, and perform all sorts of operations on it.
let submitButton =
document.querySelector('#submit-button');
Notice how the ID needs to be prefixed by the pound character (#), just like when you select IDs in CSS. If it were a class name you’d use (you guessed it) a period (.), like .submit-button
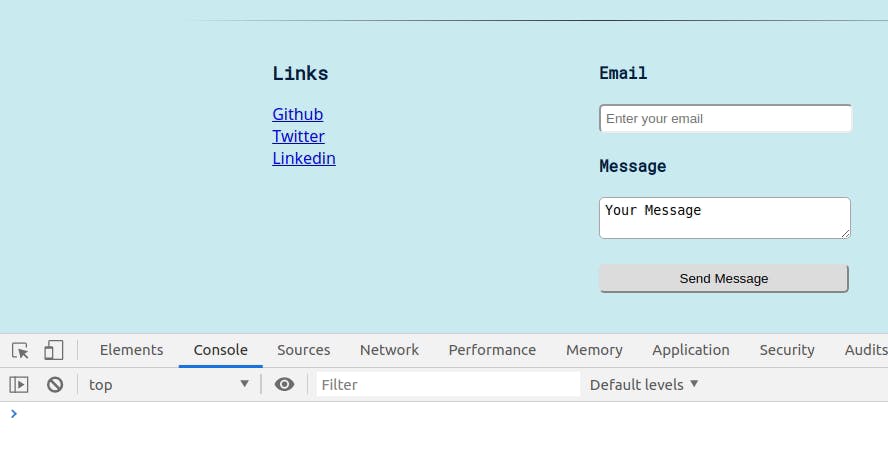
Pro tip: When in doubt, try console.log() to ‘log’–that is to display a certain message in the Chrome Developer Console–the variable in JavaScript. For example, after writing the previous line, try logging the submitButton variable with
console.log(submitButton);
and check the output. If you see ‘undefined’ or ‘null’, it means something is incorrect.
In general, try tinkering with the developer tools. It takes time, but once you get the hang of it, figuring out what went wrong (‘debugging’) becomes easier.
3. Attaching a ‘click’ listener
Now that we have the HTML element selected and stored in a JavaScript variable, let’s add a click listener function to it. A click listener, as the name suggests, listens or waits for a click. We attach click listeners to certain elements that are of our interest–form submit buttons–for example. When the said HTML element is clicked, the click listener function gets called.
function clickListener() {
  console.log('Button clicked');
}

submit.addEventListener('click', clickListener);
Notice that the click listener function is just an ordinary function that we pass to the addEventListener() function (yes, passing functions to other functions as arguments is possible and very common in JavaScript!).
But before we try to run this, we’ll need to make some changes to the above code to make sure it runs properly.
You can also try running the CodePen snippet. Click the ‘Send Message’ button and then open the Developer Console in the same window as the one you’re reading this course in. You should see the text Button clicked in the console.
let submitButton =
document.querySelector('#submit-button');

function clickListener(event) {
  event.preventDefault();
  console.log('Button clicked');
}


submitButton.addEventListener('click', clickListener);
Essentially, we’re taking the event parameter supplied to our function, which contains the details of the click event (like what was clicked, button properties, etc), and preventing the form from refreshing the page with event.preventDefault()
Save and reload. Open the Developer Tools, Console tab and try clicking the button.
Hurray!! It works.
Our next step is to get the values entered into the form using JavaScript.
4. Getting user entered values
We have a form on our webpage, but we haven’t talked about how we’ll extract the data that a user might enter in our form. To make any form ‘work’, we generally get the data (that is, text in our case) inside of the form elements (inputs, textareas etc) into JavaScript variables and then send it to the server. Optionally, many developers like to do some validations (that is, checks) on the data before sending it to the server. An example validation could be checking the format of the email entered.
Remember the document.querySelector we used in the previous section? We used it to select HTML elements. Since form inputs are nothing but HTML elements, and the data that a user might enter in those inputs is stored inside of the HTML elements, we could use the same document.querySelector and select our HTML elements.
Then, we need to know a crucial piece of information. An HTML input’s value, or the data inside of it, can be accessed via the ‘value’ key. Remember Objects? The HTML input element object will have a ‘value’ key that holds the current text inside of the element.
Finally, we’ll console.log the values from the input and textarea and see what we’re getting in the emailText and messageText variables.
function clickListener(event) {
  event.preventDefault();

  let emailInput =
document.querySelector('#email');
  let messageInput =
document.querySelector('#message');

  let emailText = emailInput.value;
  let messageText = messageInput.value;

  console.log('email:', emailText, 'message:', messageText);
Perfect! Did you see how the message just logs, flawlessly? Beautiful, we say. Instead of just printing the emailText and messageText, we’ve formatted it a bit using console.log('email:', emailText, …) which will print it nicely with the label email: printed as is.
It is possible that you might see some errors at this point. Just go back and make sure you type it exactly as it is. Play around and try different inputs. Did you notice any issues?
Pro tip: It is important to make mistakes. You should get used to seeing error messages and knowing what they mean. It might feel a bit cryptic in the beginning, but practice is the key. So whether you get it right straight away or after a bit of trying, there’s always something to be learned.
5. JavaScript validations
If you played around a bit in the previous section, you’ll have noticed something weird. Although the input fields say email and message, you can pretty much enter anything into it and it would still accept and print it.
In fact, it even allows you to enter empty an empty email address and message. That’s not good. We’ll need to set some restrictions for what gets entered, especially the email field. For our purposes, checking to see if the text entered in the email field has an ‘@’ character will do. In the real world, you’ll want to do more stringent checks on the data.
For validating email, we need to write a validation function. Validation, as mentioned in the previous section, are checks. They could be checks to make sure the data is in the format we expect, or to filter any unwanted words from the text, or anything else. They serve as an easy way to let the users know about any errors in their data submissions.
In our email address validation example, our check for ‘@’ might catch the instance where our users forget to type ‘@’ or mistype their email addresses.
function emailValidate(email) {
  if(email.includes('@')) {
    return true;
  } else {
    return false;
  }
}
This function checks if the supplied text parameter email contains the ‘@’ character. It’s using something called a conditional (the ‘if’ and ‘else’ that you see). You can read it as, if yes, it returns true. Otherwise, it returns false. Let’s test it in our clickListener function by logging it to the console.
console.log(emailValidate('abc@xyz.cm'));
Okay, it works! It isn’t perfect, but it does demonstrate how expressive JavaScript is. Now we can bring everything together inside our clickListener function and display the appropriate message.
if(emailValidate(emailText) !== true) { console.log('The email address must contain @'); return false; } console.log('Thanks for your message');
Try it and view the results in your browser’s Developer Tools console.
function emailValidate(email) {
  if(email.includes('@')) {
return true;
  }
  else {
    return false;
  }
}
Here, we’re first checking the email. If it fails, we log the error message and return false (which is one way of preventing further execution of a function, meaning that our last console.log will not be executed).
If the ‘if’ block are not executed (which means return false wasn’t encountered and the function is still running), we assume all went well and display a success message. Pretty sweet, huh?
Did you get it right? Great job! If not, just look carefully. You’ll find the bug. Remember, debugging is a critical developer skill!
Thanks for getting to the end of this article
CONTACT ME
● Telegram